Well up until now, I have kept things pretty simple & calm .. But now is where I start showing off my true colors and style! I like weird things.. I like fabrics that really shouldn't go together .. And I like odd things in general. With that being said.. This transformation may seem a little odd to some people, but keep in mind you can do the same basic steps with any type of fabric and design.
My sister donated this shirt that was her husbands. I loved the colors, but I wasn't feeling a shirt for myself. So what was I to do? Well, I made a skirt of course!

First I had to cut from the arms & neckline down, but notice the material is horizontal. I am a plus size girl and confident in that fact.. But let's be real.. I don't need any sideways stripes adding definition to my bum. ;)

So I cut down the middle and placed the fabric together going up and down for a more elongated look.

Yes, it seemed to be coming together. ( one day I may get my own sewing room.. For now I'm using my daughters nursery)...I then added some lace. I told you I loved lace right and that contrasting materials make me smile. Now to see what the skirt looked like on the mannequin...

I roughly pinned the lace on to get an idea of what it would look like all while keeping in mind that my butt ( no matter how far I extend this mannequin) is still going to be larger than this fitting. Big bootie for the win! See look, no comparison..

After pinning the lace ( which was from an old skirt I had ripped apart before) I started sewing it on and kept the fabric as one long strip to make sewing the lace easier. After, I sewed the edges and hemmed the top to complete the skirt.


Next I just knew I couldn't let the sleeves go to waste.. But what should I do with them?? Of course, give them to my mini me. My daughter is still very young, so maybe she won't hate looking back on a matching outfit with her mother.. Or maybe she will.. I'll feel nostalgic and amused either way. I took the sleeves and cut the full side from both and sewed them together, this time keeping the horizontal look. ( they had to be a little different.) .. Then I folded the extra lace I had and sewed it to the bottom.

And finally I used the collar of the original shirt to create a headband. I also used the last little bit of sleeve material to make a bow for the band. In the picture she wouldn't keep the headband on so I put her silver sparkly one on. Anyway, enough of my rambling... Here are the finish products!!


She really didn't want to cooperate.. (And pants under her skirt because it's cold!!)

So, what do ya think???
 But that's okay because I don't mind experimenting and trying to utilize making a cute top out of something that started out too small for me!
  First I flipped the shirt backwards and cut up the middle of what is now the back of the shirt. Got to let out a little breathing room ya know!
  Next I took some sheet material from an old shirt that had a hole in it..
  An used it to fill in the space I let out of the original shirt. I wanted something flowy and cute!
  So I turned the original shirt inside out and pinned the white material where I wanted it to be sewn.
  Once the material was sewn on, I added a blue bow which is actually the fabric from the original collar and used the lace from the white shirt to add a little detail.
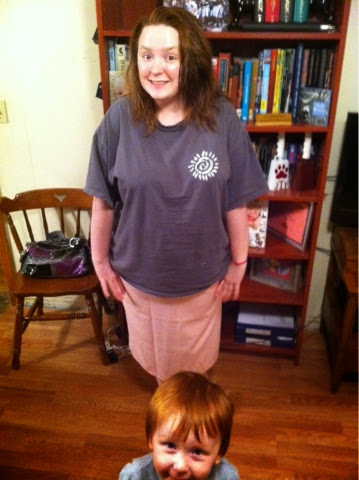
  Finally I decided to gather the material in the front of the shirt to create somewhat of a neckline and used a button from the white shirt as a small embellishment. And here I am...Rocking out Thursday night on the Ridge ( our weekly extended family dinner) and loving my new to me shirt. :) oh and that's my Dad! Always throwing the camera some big eyes!!
 So... Whatcha think?


